
(Updated June 23, 2012 for use with layout editor version 1.7.2.14)
This tutorial is for use with version 1.7.2.14 of the layout editor. If you don't have this version, I highly suggest you download it now. Because this tutorial was written before 1.7.2.14, some of the details on the screenshots may be different than the windows you see. However, the important parts of the windows are the same (the parts boxed in red), so I have not updated the screenshots. If that ever changes, I will update the screenshots to match the most current editor.
I've had several requests recently for instructions on how to use the Diff button. If you've used New From Diff, it's not too different, but it is different enough to need instructions.
First off, why should you use the Diff button? The Diff button allows you to isolate a single (or several, or many!) items from a layout, without completely removing them from the layout. Confused? Let me explain in more detail.
When you use New From Diff, you basically select the items you want, and delete the rest of the layout. The layout editor can only see the items you're working with from that point on. When you use the Diff button, the other items are still in the layout editor, you're just not working with them.
Think of it this way. You have a book. You only want to read pages 20-35. You rip out pages 20-35. Both the New From Diff and Diff buttons do this. However, with New From Diff, you burn the rest of the book. Bye bye book! Now you only have pages 20-35. With the Diff button, you rip out the pages you want, but you leave the rest of the book sitting nearby. So if you decide that you really need to add page 19 to your pile, you can rip out page 19 and add it to pages 20-35. Much more useful than burning the book, right?
With the horrifying thought of mutilating and burning books in mind, let's move on to how you use the Diff button.
First off, I'm going to assume you know how to locate layout files on your computer. We're going to skip right past finding layout files and straight on to using them.
I like to use three macros to decorate with-- "with," "without," and "working." You can call them whatever you want, but I'll be using those names.
In-game, type /save_layout working, then hit enter. This is a "prep step" that you'll never have to do again.

A few more steps you'll never have to do again:
Create a macro called WITH. Open your macro window (Hit the "o" key by default). Click an empty macro spot. The macro creation window will pop open. Name the macro WITH. Click the Add Step button. In the Command box that appears, type /save_layout with

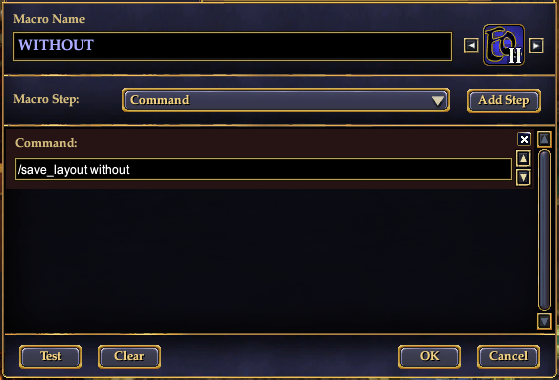
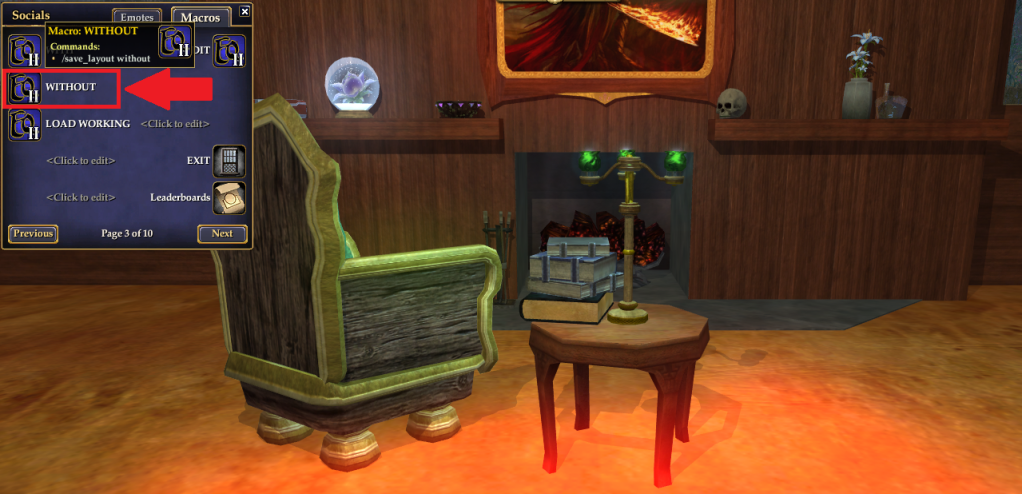
Create a macro called WITHOUT. Click an empty macro spot. The macro creation window will pop open. Name the macro WITHOUT. Click the Add Step button. In the Command box that appears, type /save_layout without
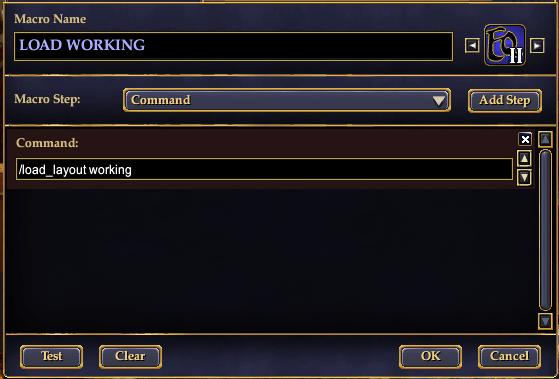
Create a macro called LOAD WORKING. Click an empty macro spot. The macro creation window will pop open. Name the macro LOAD WORKING. Click the Add Step button. In the Command box that appears, type /load_layout working
The following two prep steps won't be used in this "How To." However, they will be useful in future "How To" entries, or future use of the layout editor.
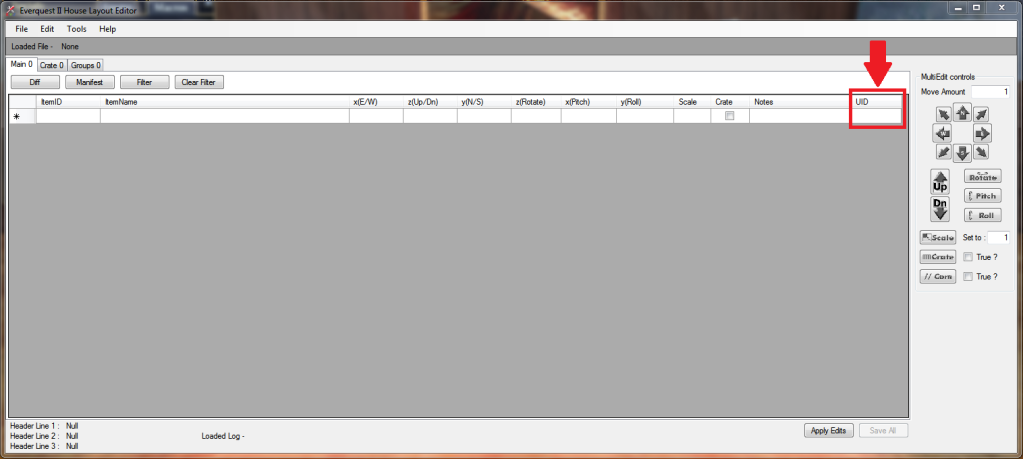
Switch to the layout editor. Make sure that the UID column on the layout editor is visible. If it isn't, grab the righthand edge of the layout editor window and drag it to the right until the column is visible.
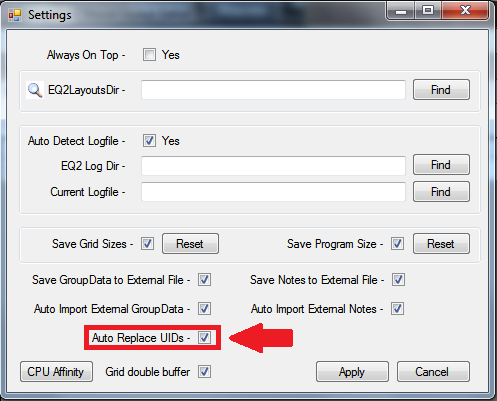
Click File -> Settings. Ensure that Auto Replace UIDs is checked. It may also be a good idea to ensure that Save Program Size is checked.
Now, on to the real instructions!
First, you want to find the item in your house you wish to isolate. In this case, we're going to use one of the verdant eucalyptus chairs. While that item is out in the house, click the WITH macro.

Right click your chosen item(s) and select Pack in Moving Crate. At this point, you can pack a single item, a few items, or many items. Whatever items you pack will show up in the layout file.

Once the item (or items) is in the moving crate, click your WITHOUT macro.
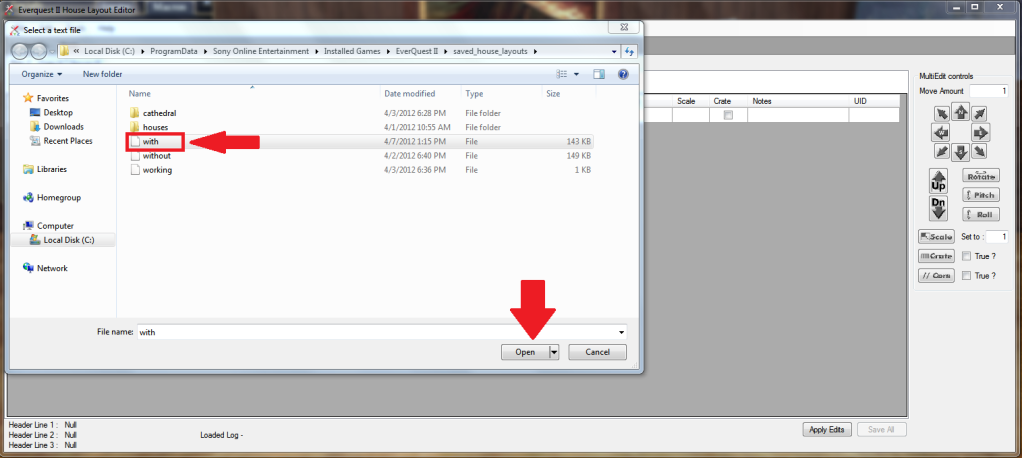
In the layout editor, click File -> Open. Select the with layout file, and click the Open button.
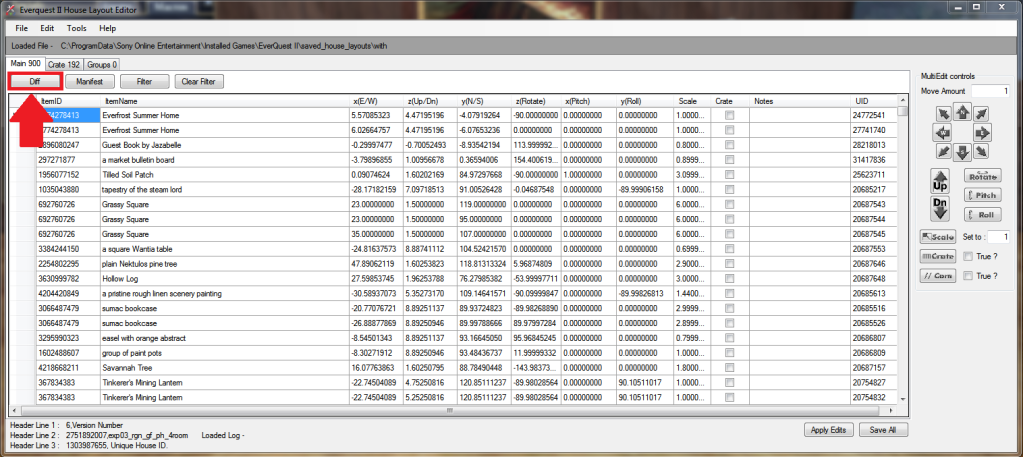
You should now be on the Main tab. Beside Main, it should list the number of items in your layout. Beneath that is a button called Diff. Click it.
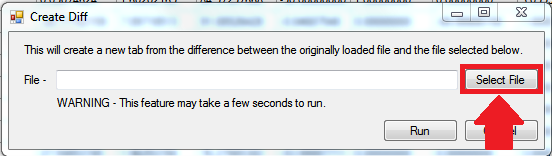
A window should pop open. Click Select File.
Select the without file, and click Open.

Once you hit Open, the window should look like this. Keep in mind that if your EQ2 is saved in a different location than mine, the text in your window will be different. The most common locations for EQ2 to be saved are C:\ProgramData\Sony Online Entertainment\Installed Games\Everquest II and C:\Users\Public\Sony Online Entertainment\Installed Games\Everquest II. That does not mean your EQ2 will be in one of those locations, just that those are the two most common locations.
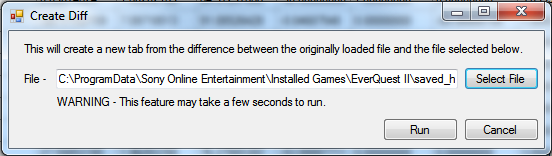
No matter what, the end text should look like this. Note that the final word is without. Select Run.

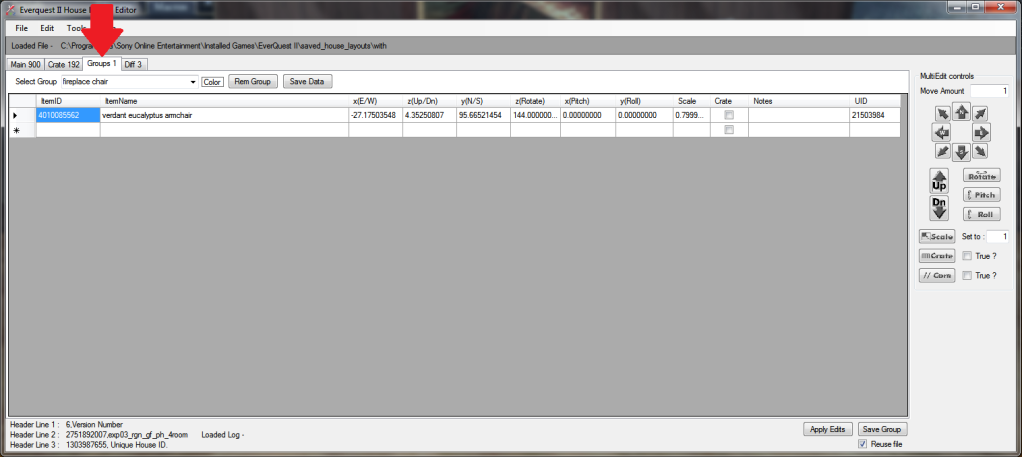
You should now be on the Groups tab. Beside the word Groups there should be a number indicating how many items are in your group.
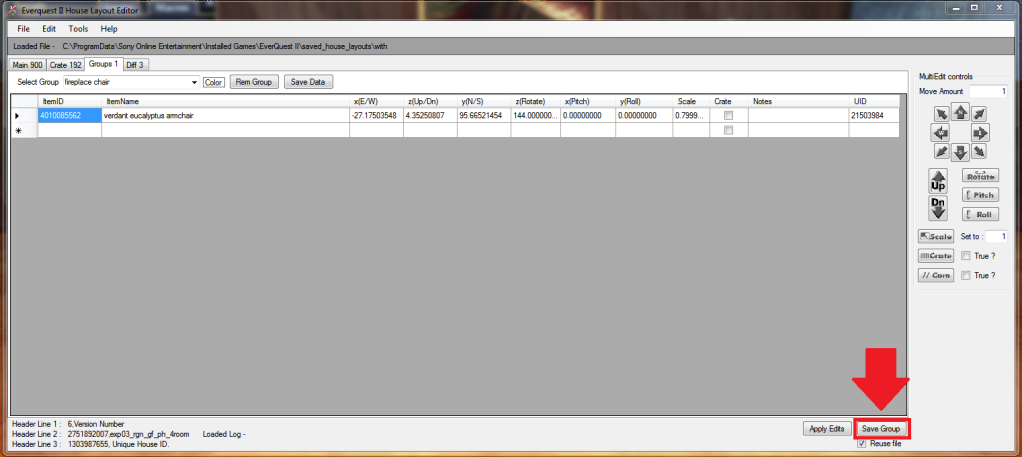
Now that you have your item in a group, look at the lower right of the layout editor. There is a button that says Save Group. Click it.
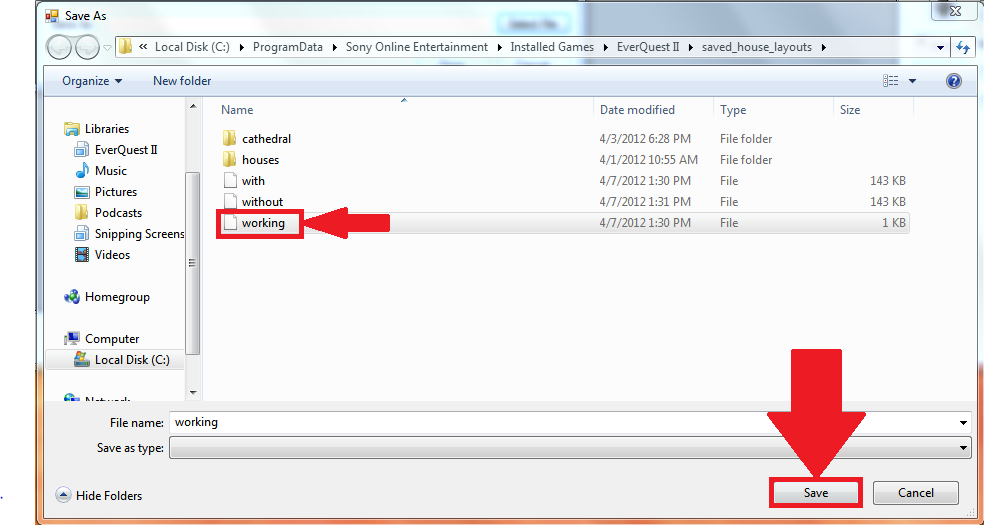
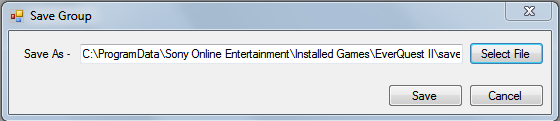
A window will pop up. Click Select File.

Select your working file, then click Save.
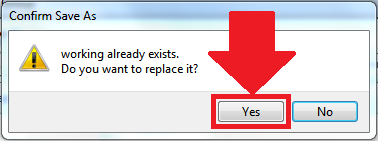
You will be warned that a file of that name already exists, and asked if you want to replace it. Click Yes.
Now the window should look like this:
Or like this if you scroll to the end. Note that the last word is working. Click Save.

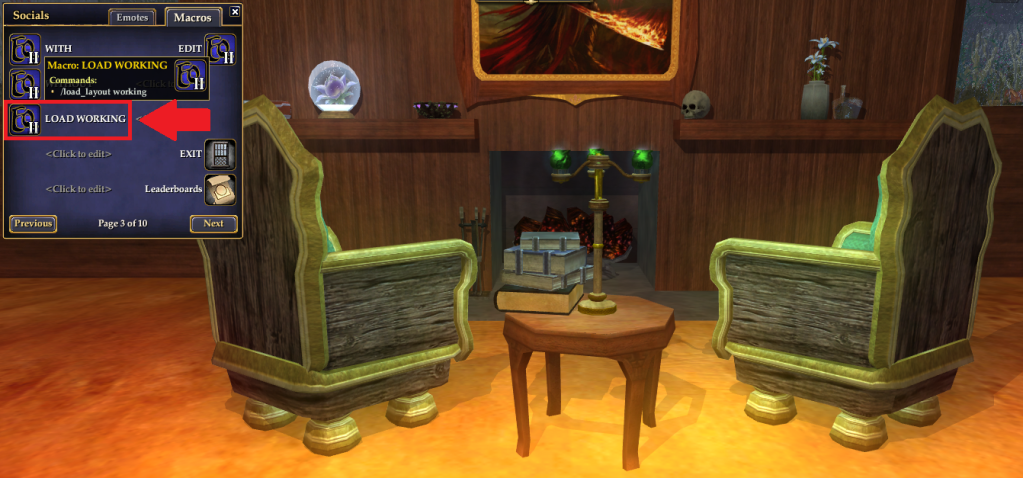
Back in game, click your LOAD WORKING macro. Taadaa! Your item has reappeared in game! You officially now know how to use the Diff button to isolate an item (or items) in the layout file!
Want to see it all in action? Check out the video below to see how this works in-game!
Once the item (or items) is in the moving crate, click your WITHOUT macro.
In the layout editor, click File -> Open. Select the with layout file, and click the Open button.
You should now be on the Main tab. Beside Main, it should list the number of items in your layout. Beneath that is a button called Diff. Click it.
A window should pop open. Click Select File.
Select the without file, and click Open.
Once you hit Open, the window should look like this. Keep in mind that if your EQ2 is saved in a different location than mine, the text in your window will be different. The most common locations for EQ2 to be saved are C:\ProgramData\Sony Online Entertainment\Installed Games\Everquest II and C:\Users\Public\Sony Online Entertainment\Installed Games\Everquest II. That does not mean your EQ2 will be in one of those locations, just that those are the two most common locations.
No matter what, the end text should look like this. Note that the final word is without. Select Run.
You should now be on the Groups tab. Beside the word Groups there should be a number indicating how many items are in your group.
Now that you have your item in a group, look at the lower right of the layout editor. There is a button that says Save Group. Click it.
A window will pop up. Click Select File.
Select your working file, then click Save.
You will be warned that a file of that name already exists, and asked if you want to replace it. Click Yes.
Now the window should look like this:
Or like this if you scroll to the end. Note that the last word is working. Click Save.
Back in game, click your LOAD WORKING macro. Taadaa! Your item has reappeared in game! You officially now know how to use the Diff button to isolate an item (or items) in the layout file!
Want to see it all in action? Check out the video below to see how this works in-game!
No comments:
Post a Comment